
The easiest way to learn how to ride a bike is to strip it down to its basic essentials: two wheels, a seat, and steering. This focuses on the essential skill of maintaining balance.
Why not just use training wheels? The training wheels shift the focus away from keeping balance (since the wheels automatically keep the rider up) to pedaling.
As soon as someone is old enough to run, they are old enough to learn to ride a bike, but they might not yet have the coordination to pedal yet (since it’s not an intuitive motion) or the strength, especially since kid’s bikes are disproportionately heavy. I wanted a bike that is as light as possible.
Introducing pedals also means having brakes. Rubbing feet against the ground might work, but those darned pedals get in the way. Figuring out the brakes is a lot to ask of a two-year-old, on top of pedaling, steering, and keeping their balance.
I wanted to buy a run bike for my daughter, but at the time they were around $150. I happened to have some scraps of baltic birch plywood from some cabinets that I was making, so I decided to make my own bike. It doesn’t take a lot of wood to make a bike, so if you’re into woodworking, this is a great project to use up scraps, but I think that only plywood will be strong enough. I basically copied the design of existing bikes that were available.
Ingredients
- 6mm baltic birch plywood
- scrap bits of 2×4
- a door hinge
- wheels from a kid’s bike
- 18mm baltic birch
- screws and bolts
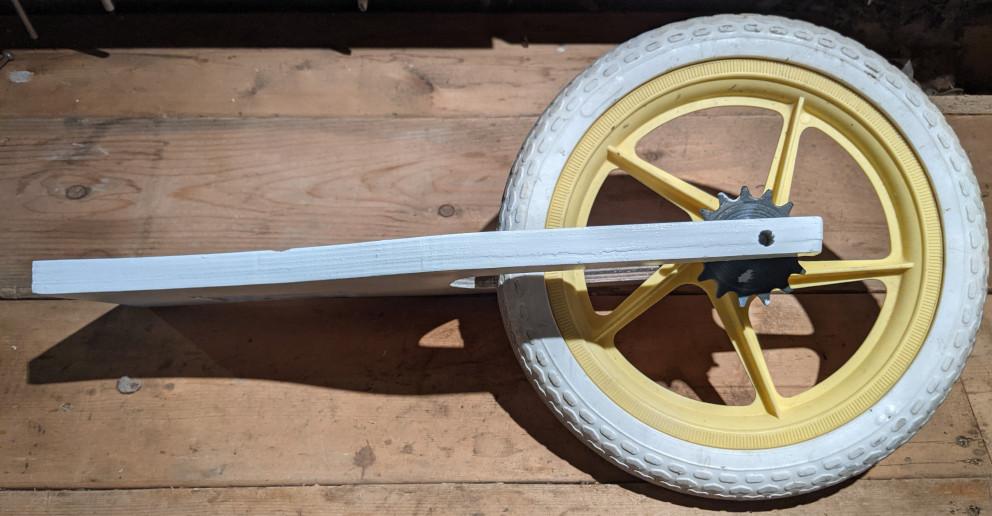
Getting wheels
I started off scavenging around on garbage day for a kid’s bike to get the wheels. I found a yellow rusty Dora the Explorer bike with a broken plastic seat. I might have gotten lucky and found an amazing lightweight bike in excellent condition, in which case I would have taken off the pedals and chain guard and called it a day. I did not find such a bike.
Now, isn’t looking for a kid’s bike missing the whole point of this project? Why find a bike just to make another bike? I thought that even in the best case, the bike that I found was not going to be as awesome as the bike that I made.
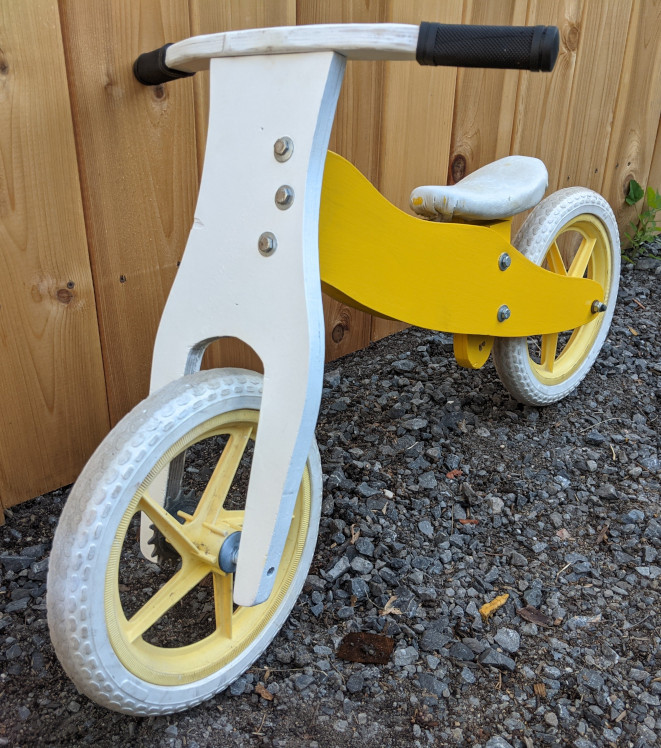
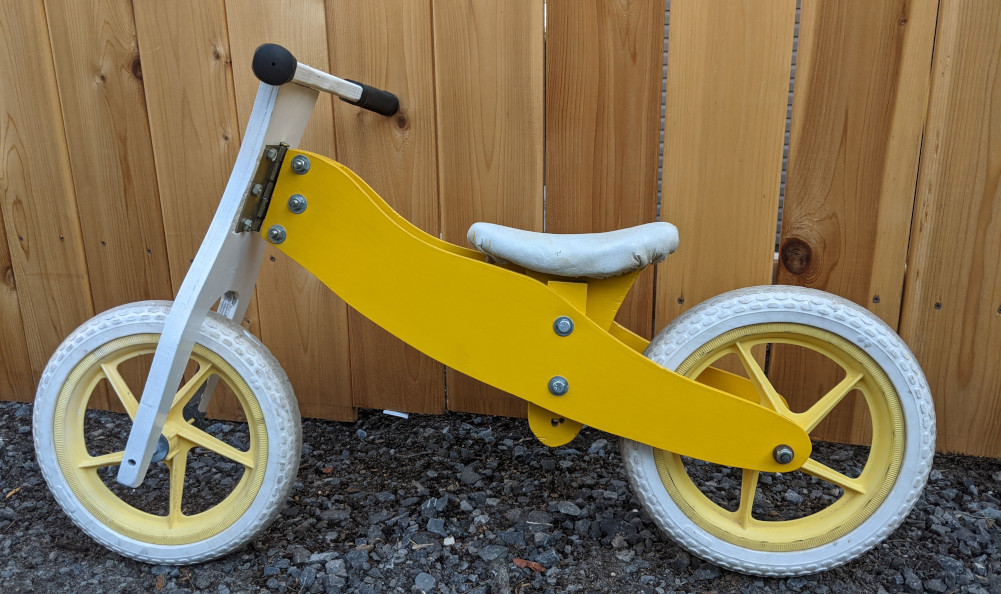
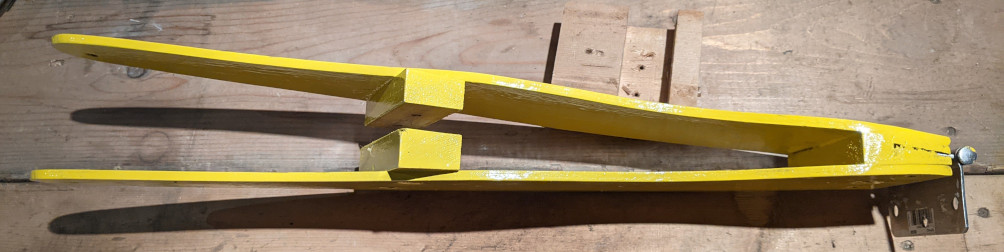
The big picture
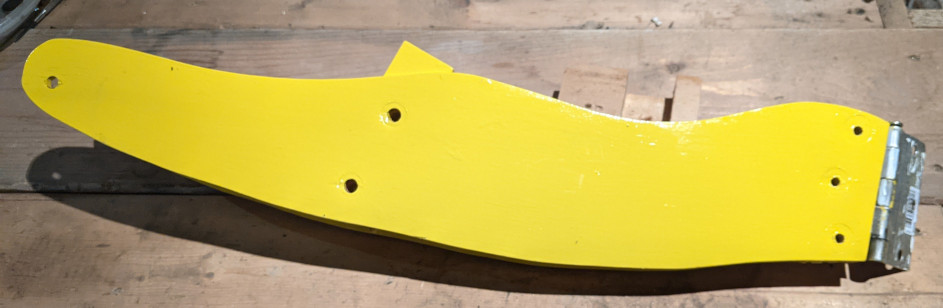
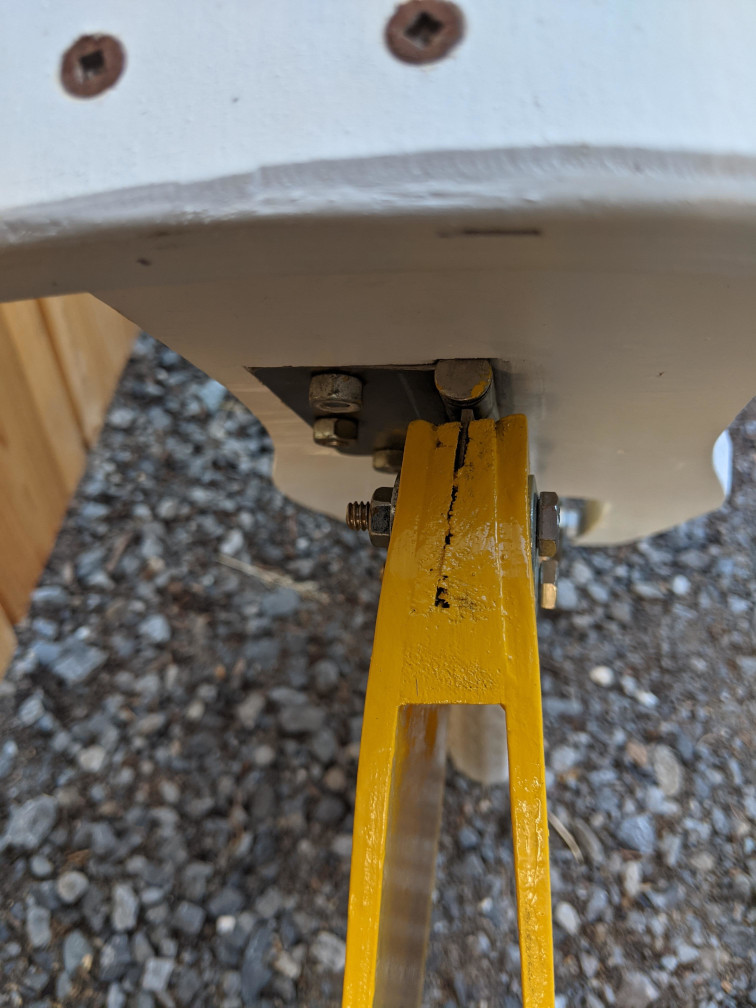
The bike is made from 6mm plywood for the frame, with 18mm plywood for the forks and handlebar. The “headset” is a door hinge attached to a piece of wood cut from 2×4 stock, which is sandwiched by the plywood. The seat “stem” is 18mm, bolted in place, with extra length so that I can raise the seat later.
Making the forks
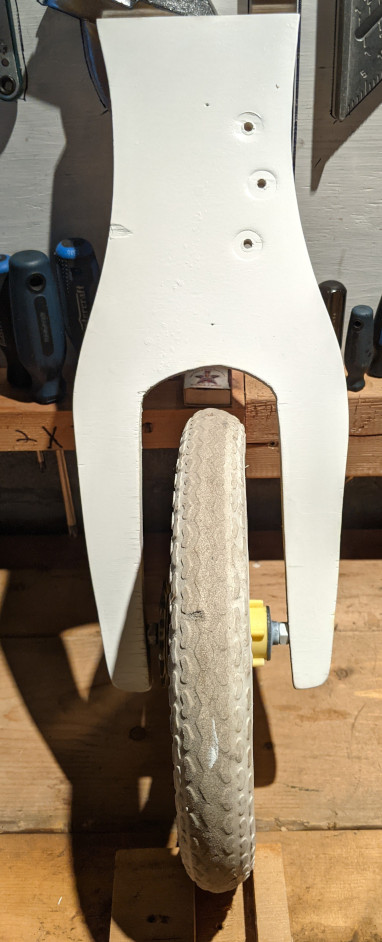
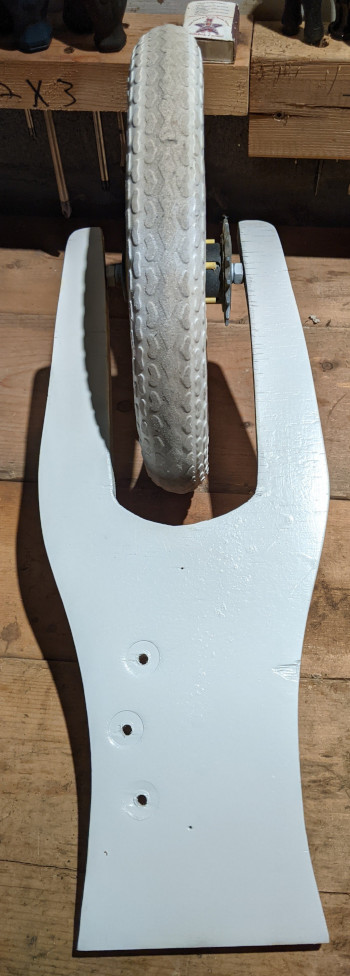
The forks are made from 18mm baltic birch plywood. I made a template from paper folded in half to make sure that it would be symmetrical. For the axle, I used a section of threaded rod, with nuts and washers on the inside of the forks. I drilled a hole horizontally on both sides, slid the threaded rod in from one side, then attached the first nut, then a washer, then the wheel, then another washer, then the second nut. Tightening down on the nut pulled the threaded rod through the hole.
I made the front “forks” 42 cm tall (including the wheel). I measured how high my daughter’s elbows were from the floor when standing up straight with her arms hanging down. The front forks are at a relaxed angle, around 70 degrees, with the frame attached halfway between the top of the wheel and the handlebars. Each side of the forks starts at an inch wide and becomes about twice that towards the top. Kids have thoroughly crashed this bike into things and it hasn’t broken, so no need to make it any beefier.
Making the frame
I (somewhat arbitrarily) decided that the front end should be an inch wide. The back end needs to be wide enough to fit on both sides of the rear wheel.
In my case, the frame is 46cm long. Why? My daughter needs to be able to reach the handlebars comfortably. I had her sit upright in a chair and reach forwards, holding a horizontal broomstick comfortably. Measure the distance between the chair and the broomstick. Next, there needs to be enough room behind the seat to fit the wheel, so add that to the total length, with a bit of extra room between the tire and the seat post so that leaves and stuff can get through. Simple enough.
At this point, I cut out both sides of the frame. I liked to give them a nice curve, but they could be straight too.
I had to figure out what angle to cut the front end of the frame at so that the forks are at the right angle. I wanted the forks to be about 70 degrees. I laid everything out horizontally (like the bike was lying on its side on the ground) so it was easier to fiddle with the parts.
Cutting the wooden “head tube”
I used a scrap of 2×4. The order of the cuts mattered because if I cross-cut it first I’d be stuck with a really short bit that is hard to rip after.
First, I ripped a vertical cut at 90 degrees to remove the curved edges. Next, I figured out the spread that the frame will have from front to back (24 mm, outside dimension, wide at the front, and wide enough to hold the wheel at the rear) and used that angle to make the next two cuts.
The second cut was to receive the door hinge, at the same depth as the hinge was wide, 6 mm away from the first. The third cut made the spacer the right width, 12mm.
Finally, I cross-cut the scrap to match the frame.
Making the seat
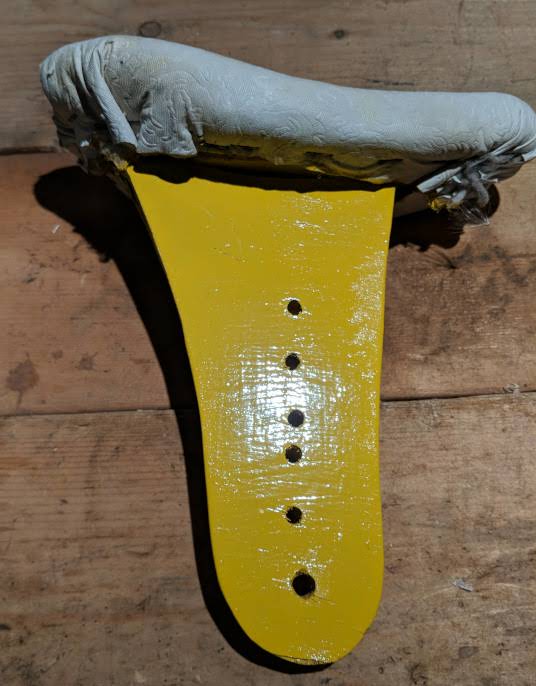

For the vertical part (the “post”, I used some 3/4″ plywood and cut a roughly roundish shape. I didn’t drill holes to attach it to the frame yet.
For the flat part (the “seat”), I just rough cut something in the shape of a seat with the bandsaw and then carved at it until I had something reasonable. I glued and screwed it to the post, then added a thin layer of soft foam (like from an old yoga mat) to hide the screws and give a bit of comfort and covered it with some vinyl that I can’t remember where it came from. Maybe a patio chair? A shower curtain? Who knows. I attached it to the seat bottom with T50 staples.
Making the handlebar
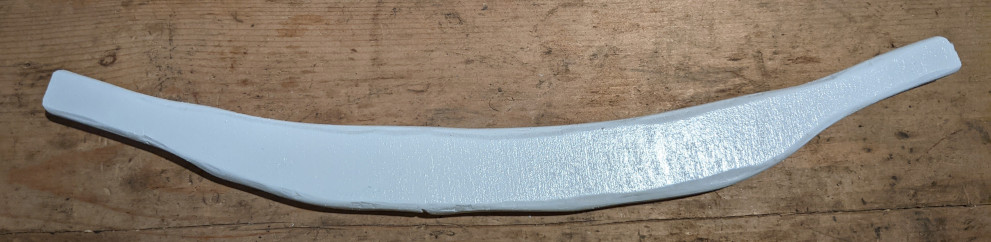
To make the handlebar, I used a jigsaw to freehand out something from 18mm (3/4″) plywood and then smoothed over the edges using a rasp, chisel, and sandpaper. I put rubber BMX grips over the ends.
Putting it all together
First, I attached the handlebar to the fork. I used three screws and glue for this.
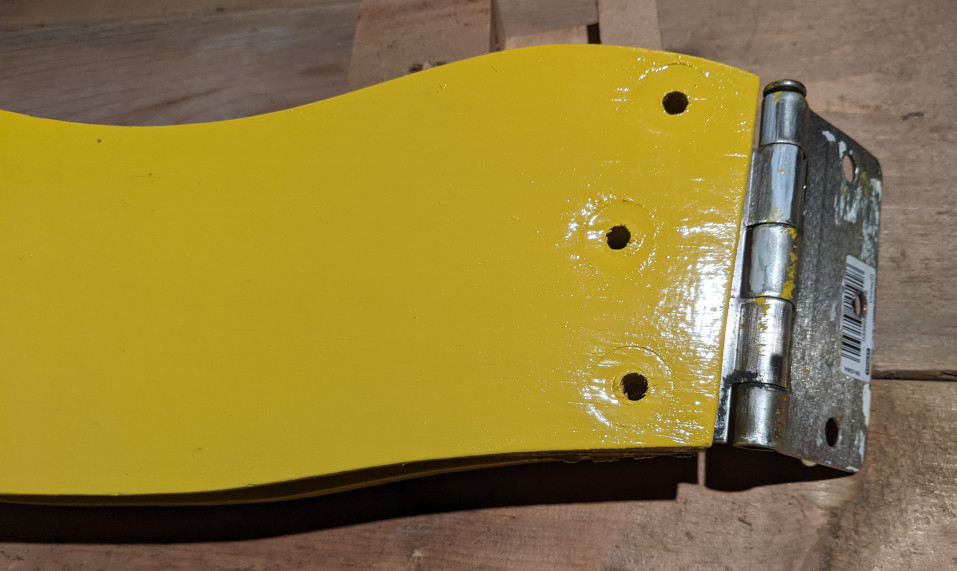
Next, I chiseled out a place in the fork for a regular door hinge to fit in.
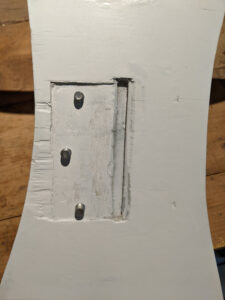
Once I could put the hinge in flush, I clamped it into place and used the holes as a template to drill out holes for 1″ bolts.
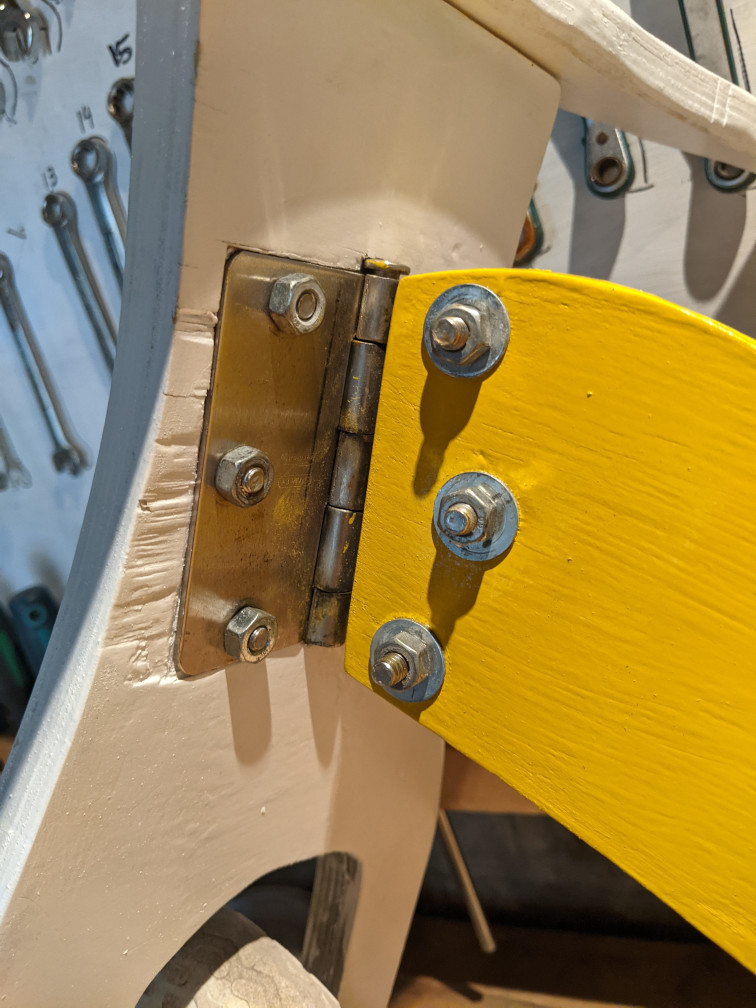
I then put the head tube and frame together and used the hinge as a template (clamped in place on the outside) to drill holes through the body of the bike.
I put on the back wheel, and then attached the head together, using washers to keep the bolts and nuts from pulling into the wood:
Almost done! Now I needed to attach the seat. The frame had a gap that needed spacers to hold the seat (Here I took the picture with the wheels and handlebar off, but at the time I worked with the wheels in place to make sure that I put the spacers vertically):
I made the spacers out of some scrap pine I think, but it might have been 2×4. I measured the width between the two thin plywood frame pieces, subtracted the width of the seat post (18mm), and divided it by two, and that gave me the width for the spacer, factoring in the correct angle.
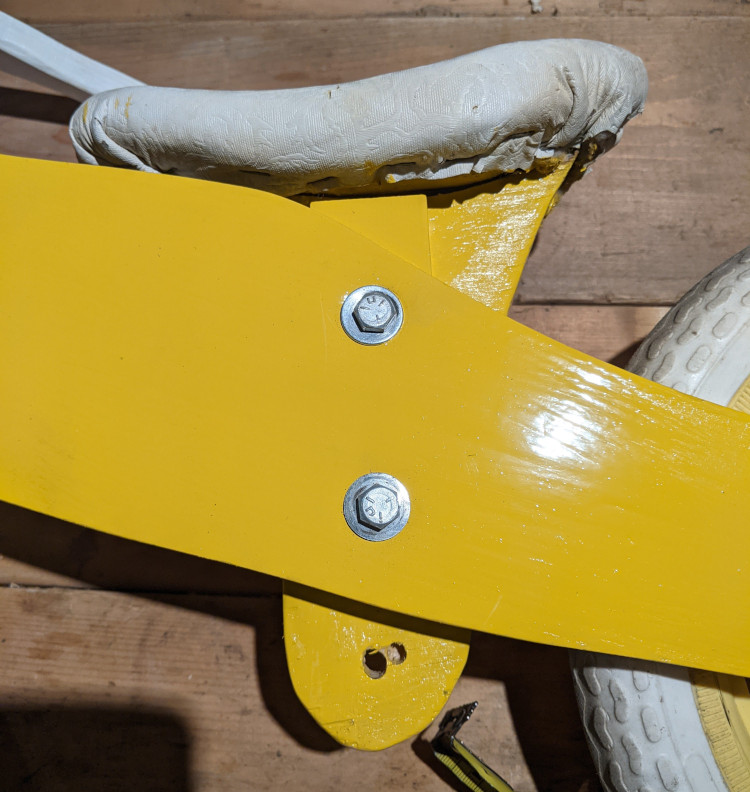
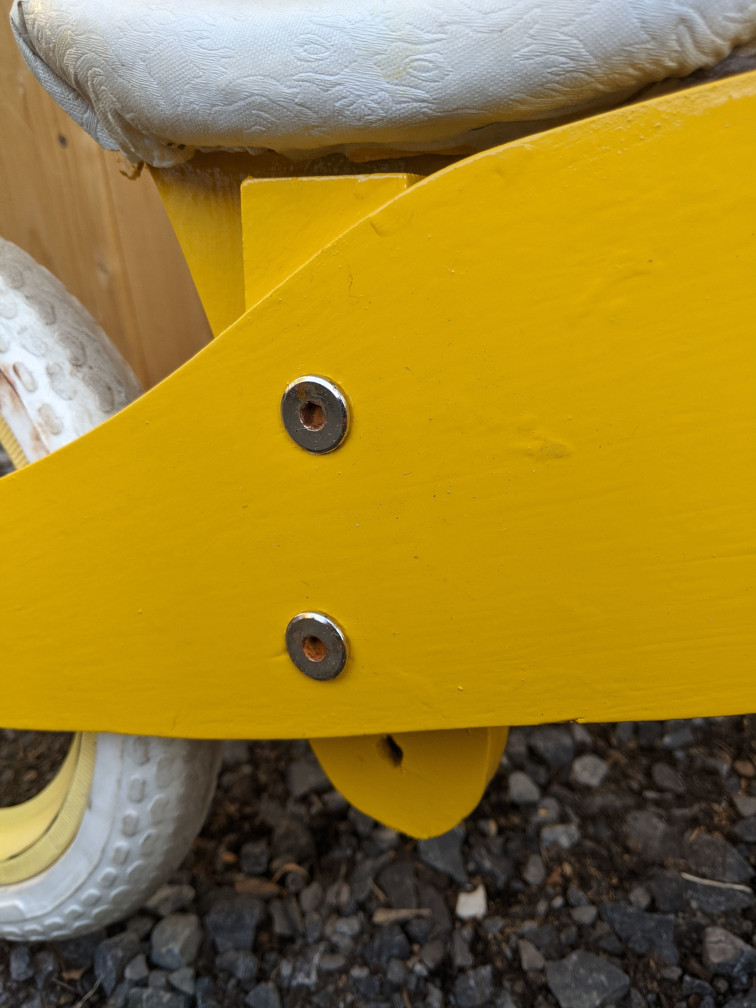
I clamped it all together and then drilled through two holes for the bolts (it didn’t really matter exactly where). I didn’t want the end of the bolt sticking through and maybe scratching legs, so I used connector cap nuts (which is what home depot calls them, but just now I learned that they are also called sex bolts) and cut the end of the bolt to the right length. A nice thing about this approach is that when I want to raise the seat, I can undo the bolts, raise the seat, and use the existing holes in the frame as my template to drill new holes into the seat post.
And that was it! This isn’t meant to be a how-to instructional guide, more like the story of how I did it. Let me know if you found any part of this confusing or if you’ve made a bike yourself in the comments below.
2 thoughts on “How I built my own run bike”
Great write up. And it looks like fun bike for kids. And insight what the final cost was if you consider scrap as zero value?
Hi Hans! The final cost was free because I had all of the materials on hand or salvaged from the garbage (the kid’s bike)